Managing storage effectively is one of the most important tasks for keeping your Windows 11 computer running smoothly. Whether you’re upgrading your hard drive, installing a new SSD, or simply trying to organize your files more efficiently, you’ll eventually need to adjust partitions, create new volumes, or format drives. This is where Disk Management comes in—a built-in utility in Windows 11 that allows you to manage your storage devices without needing any third-party tools.
For many users, Disk Management may seem intimidating at first glance, but it’s actually a straightforward and powerful tool once you understand how it works. With just a few clicks, you can shrink or extend partitions, assign drive letters, or even convert a basic disk into a dynamic disk. These functions are essential when you want to make better use of your available space or prepare a drive for specific tasks.
In this complete guide, we’ll take you through everything you need to know about using Disk Management in Windows 11. From opening the tool to performing advanced operations, you’ll learn step-by-step instructions that even beginners can follow confidently. We’ll also cover practical scenarios, such as setting up a new hard drive, fixing unallocated space issues, and troubleshooting common errors.
By the end of this guide, you’ll not only know how to use Disk Management but also understand when it’s the best tool for the job—and when you might need to consider alternatives. Whether you’re a casual user looking to free up space or a power user optimizing system performance, this guide will help you take full control of your PC’s storage.
Also read: Windows Keyboard Shortcuts
Table of Contents
What is Disk Management in Windows 11?
Disk Management is a built-in system utility in Windows 11 that allows users to manage storage devices, partitions, and volumes without the need for third-party software. Think of it as a control center for your hard drives and SSDs. With Disk Management, you can create, resize, format, delete, and manage partitions to make the best use of your system’s storage.
Key Functions of Disk Management
Disk Management provides several essential features, including:
-
View storage details – See all connected drives, partitions, and their status at a glance.
-
Create partitions – Split a drive into multiple sections for better file organization.
-
Resize volumes – Shrink or extend partitions depending on your storage needs.
-
Format drives – Prepare a drive for use, erase data, or change the file system (e.g., NTFS, exFAT).
-
Assign or change drive letters – Customize how drives appear in File Explorer.
-
Mark partitions as active – Set the primary boot partition when configuring multiple operating systems.
-
Initialize new disks – Prepare newly installed hard drives or SSDs for first-time use.
Why Disk Management Matters in Windows 11
Storage isn’t just about having enough space—it’s about using it efficiently. For example, if you install a new SSD, Windows may not automatically assign it a usable partition. Without Disk Management, that drive might remain invisible in File Explorer. Similarly, if your system drive is running low on space, you can extend the partition instead of buying a new disk immediately.
Built-In Convenience
The best part? Disk Management comes pre-installed with Windows 11, meaning you don’t have to download extra tools. While advanced users might prefer third-party applications for features like partition recovery, Disk Management is often more than enough for everyday tasks.
How to Open Disk Management in Windows 11 (5 Easy Methods)
Before you can start creating or resizing partitions, you first need to know how to access Disk Management in Windows 11. Luckily, Microsoft provides several quick ways to open this tool. Here are five reliable methods you can use:
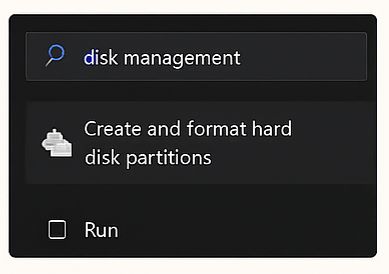
Open via the Start Menu
-
Click the Start button or press the Windows key.
-
In the search bar, type Disk Management or Create and format hard disk partitions.
-
Select the matching result.
This is the simplest way for beginners and works on any Windows 11 device.
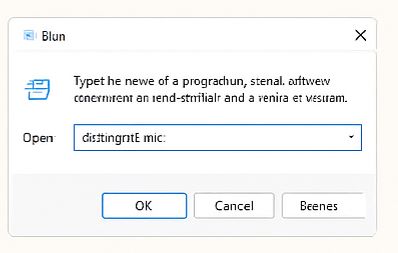
Use the Run Command
-
Press Windows + R on your keyboard.
-
Type
diskmgmt.mscand hit Enter.
This command instantly launches Disk Management without going through menus.
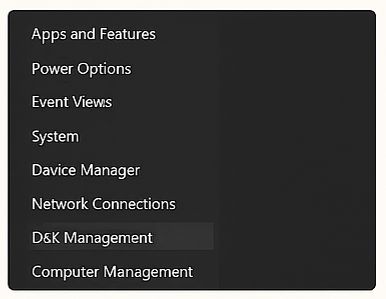
Access from Quick Link Menu (Power User Menu)
-
Right-click the Start button or press Windows + X.
-
From the menu, choose Disk Management.
This method is especially handy if you’re already using other system utilities.
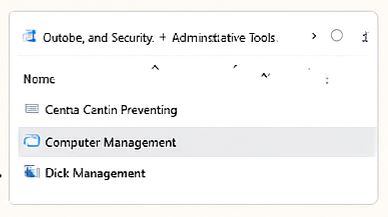
Open Through Control Panel
-
Press Windows + S and search for Control Panel.
-
Go to System and Security > Windows Tools.
-
Double-click Computer Management.
-
In the left pane, expand Storage and select Disk Management.
While it takes a few more clicks, this method also gives you access to other advanced tools.
Launch from Task Manager
-
Press Ctrl + Shift + Esc to open Task Manager.
-
Click File > Run new task.
-
Type
diskmgmt.mscand press Enter.
This is useful if your system is lagging and you can’t easily access the Start Menu.
Pro Tip for Faster Access
If you use Disk Management frequently, you can pin it to the Start Menu or Taskbar. Just search for it once, right-click the result, and choose Pin to Start or Pin to taskbar.
By learning these five methods, you’ll always have quick access to Disk Management, whether you’re troubleshooting storage issues or setting up a brand-new drive.