In today’s globalized world, where people from diverse linguistic backgrounds use computers for work, education, and entertainment, the ability to customize your operating system’s display language is more important than ever. Whether you’re an expatriate living abroad, a language learner practicing a new tongue, or simply someone who prefers their interface in a native language, Windows 10 and Windows 11 make it relatively straightforward to switch the display language. This comprehensive guide will walk you through the process step by step, ensuring you can change the language settings without hassle. We’ll cover everything from the basics to advanced troubleshooting, making this tutorial suitable for beginners and experienced users alike.
Changing the display language in Windows affects the text in menus, dialogs, and other system elements. Still, it doesn’t alter the language of your installed apps unless they support multilingual interfaces. Microsoft supports over 100 languages, including major ones such as English, Spanish, French, Chinese, Arabic, and numerous regional variants. This flexibility is one of the reasons Windows remains a top choice for international users. According to recent statistics from Microsoft, millions of users switch languages annually to better align their devices with personal or professional needs.
Before diving into the instructions, it’s worth noting that while the processes for Windows 10 and Windows 11 are similar, there are subtle differences in the user interface due to Windows 11’s more modern design. We’ll address both versions separately for clarity. This guide is optimized for search engines like Google and Bing, incorporating key phrases such as how to change display language in Windows 10/11, and Windows language settings tutorial to help you find it easily. If you’re ready to make your PC multilingual, let’s get started!
Also Read: How to Set Up a Microphone in Windows PC
Table of Contents
Why You Might Want to Change the Display Language
There are numerous reasons why users opt to change the display language on their Windows devices. For instance, if you’ve purchased a computer in a foreign country, it might come pre-installed with a language you’re not comfortable with. Travelers often switch languages to match their current location, aiding in communication or using local apps. Language enthusiasts use this feature to immerse themselves in a new dialect, practicing reading and navigation in real-time.
From a productivity standpoint, using your native language can reduce errors and speed up tasks. Imagine trying to troubleshoot an issue when all error messages are in an unfamiliar script—frustrating, right? Businesses with international teams also benefit, as employees can customize their workstations without IT intervention. Additionally, accessibility plays a role; for visually impaired users relying on screen readers, the correct language ensures accurate pronunciation.
Microsoft has made language packs free and easy to download, requiring only an internet connection. However, be aware that some languages might not have full support for features like speech recognition or handwriting input. In Windows 11, the integration with Microsoft Store apps means that changing the display language can also influence app interfaces if they’re designed for it.
This customization extends beyond just the OS. For example, Cortana (in Windows 10) or the new Copilot in Windows 11 might respond better in your preferred language. Parents setting up devices for children can choose kid-friendly languages, while educators might switch to teaching foreign languages interactively.
In terms of SEO benefits, searches for Windows 10 language change guide or how to install language pack Windows 11 spike during back-to-school seasons or after major OS updates. This post aims to provide value by including detailed steps, visuals, and tips to avoid common pitfalls, making it AdSense-friendly with natural ad placements between sections.
Prerequisites for Changing the Display Language
Before you begin, ensure your system meets a few basic requirements. First, you’ll need administrative privileges on your account. If you’re on a work or school computer, check with your IT department, as group policies might restrict changes.
An active internet connection is essential because language packs are downloaded from Microsoft’s servers. These packs can range from 50MB to over 500MB, depending on the language and features (e.g., speech-to-text). Make sure you have sufficient storage space—Windows typically requires at least 1GB free.
Your Windows version should be up to date. Outdated systems might encounter errors during installation. To check, go to Settings > Update & Security (Windows 10) or Settings > Windows Update (Windows 11) and install any pending updates.
Back up your important data. While changing languages is generally safe, any system modification carries a minor risk of issues. Use OneDrive or an external drive for peace of mind.
Finally, note that some editions of Windows, like Home vs. Pro, might have slight variations, but the core process remains the same. If you’re using Windows in S mode, you might need to switch out of it first.
With these prerequisites in place, you’re set to proceed. Let’s start with Windows 10.
Step-by-Step Guide: How to Change the Display Language in Windows 10
Windows 10, released in 2015, has been a staple for many users, and its language settings are accessible through the modern Settings app rather than the old Control Panel. This shift makes the process more intuitive. We’ll break it down into detailed steps, explaining each one to ensure you understand not just what to do, but why.
Step 1: Open the Settings App
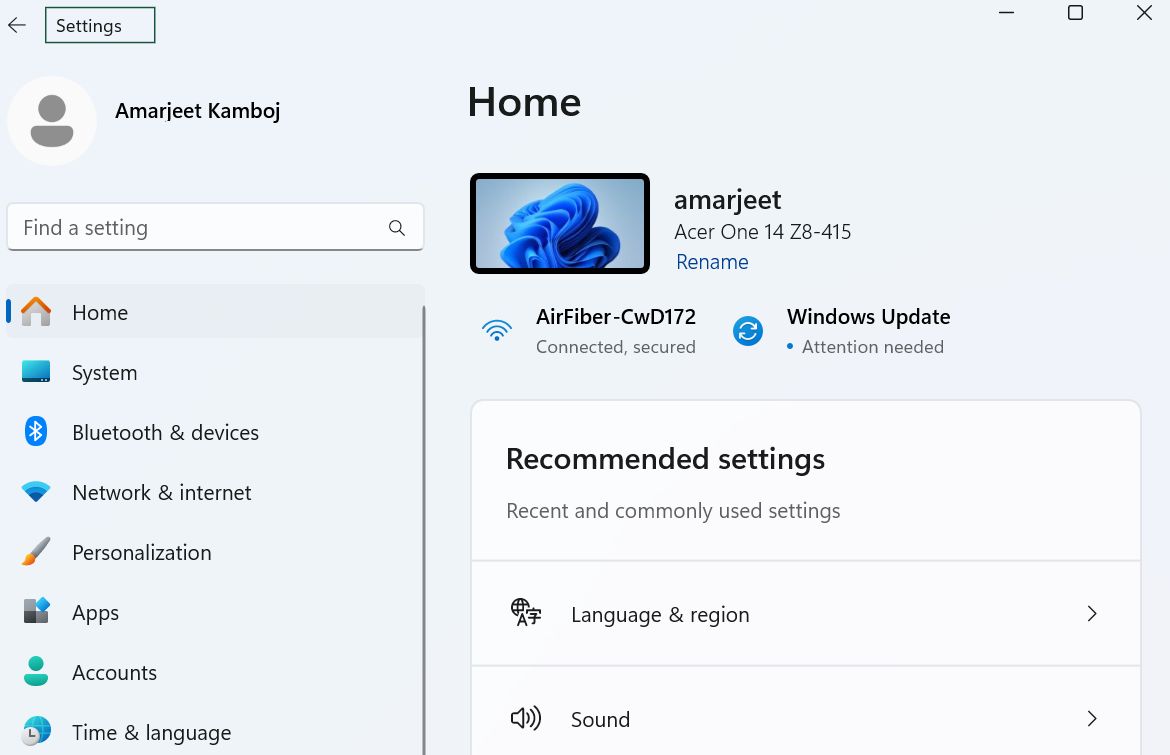
To begin, click the Start button in the bottom-left corner of your screen—it looks like the Windows logo. From the Start menu, select the gear icon labeled “Settings.” Alternatively, press the Windows key + I on your keyboard for a quick shortcut. This opens the Settings window, which is divided into categories like System, Devices, and more.
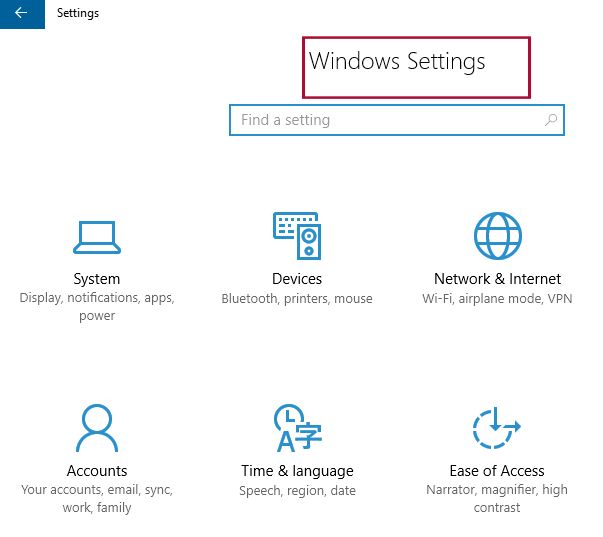
The Settings app is designed for touch and mouse input, making it user-friendly on laptops, desktops, and tablets. If you’re new to Windows 10, take a moment to familiarize yourself with this interface, as it’s central to most customizations.
Once open, you’ll see a search bar at the top. You can type “language” here to jump ahead, but for this guide, we’ll navigate manually to build understanding.
Step 2: Navigate to Time & Language Settings
In the Settings window, scroll down and click on “Time & language.” This section handles date formats, time zones, and, crucially, language and region settings.
Why is language grouped here? Because it’s tied to regional preferences, like currency symbols or calendar types. For example, switching to Japanese might automatically adjust your date format to YYYY/MM/DD.
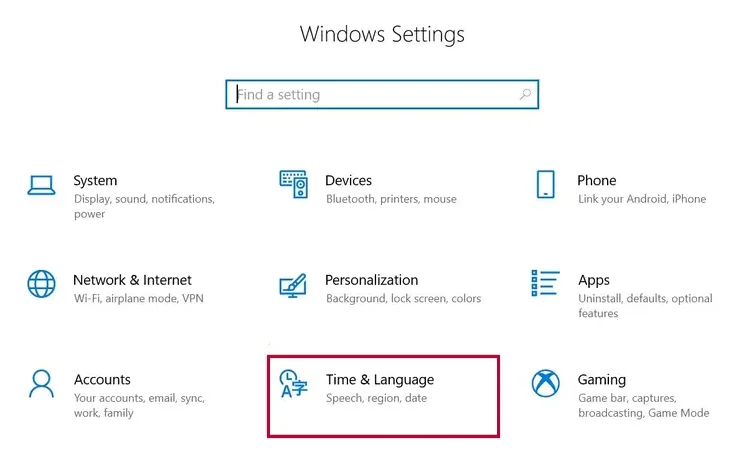
Inside Time & language, select “Region & language” from the left sidebar (in older builds) or directly “Language” in newer ones. Here, you’ll see your current preferred languages listed.
Step 3: Add a New Language
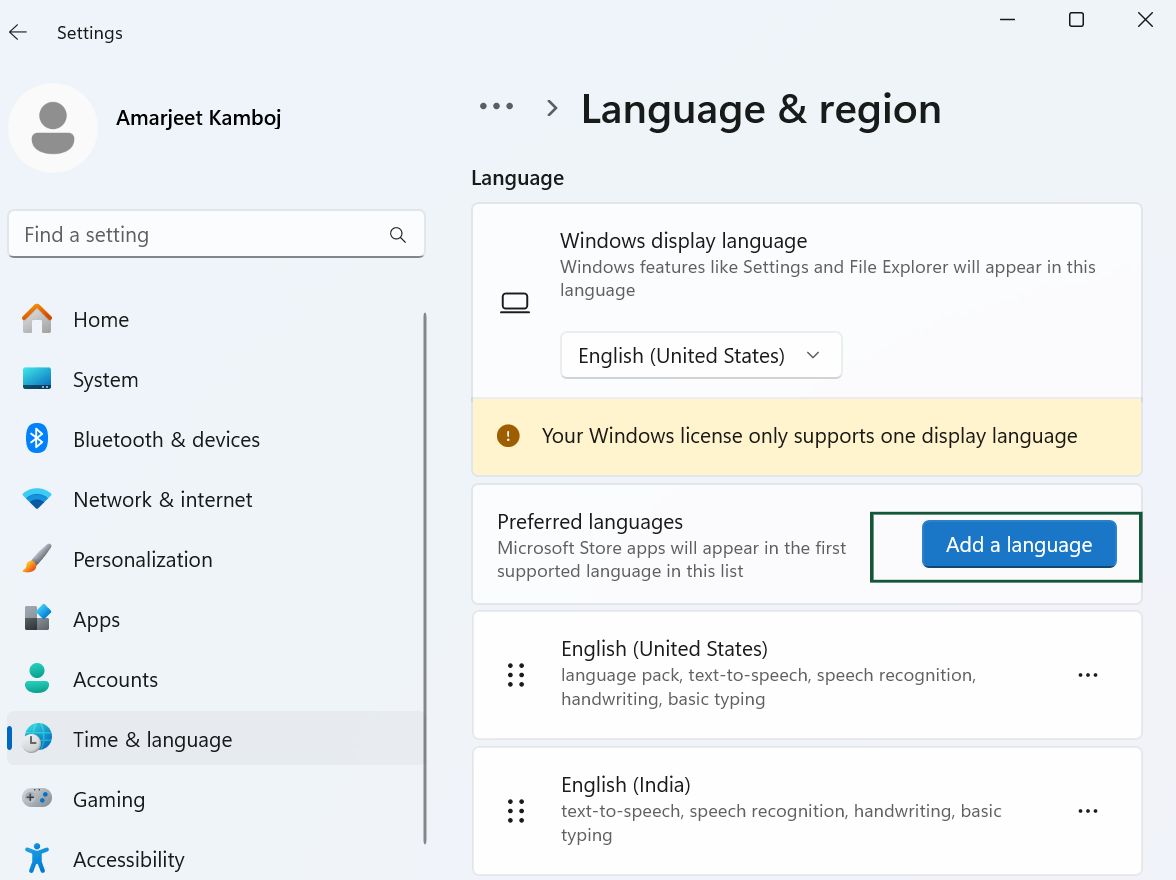
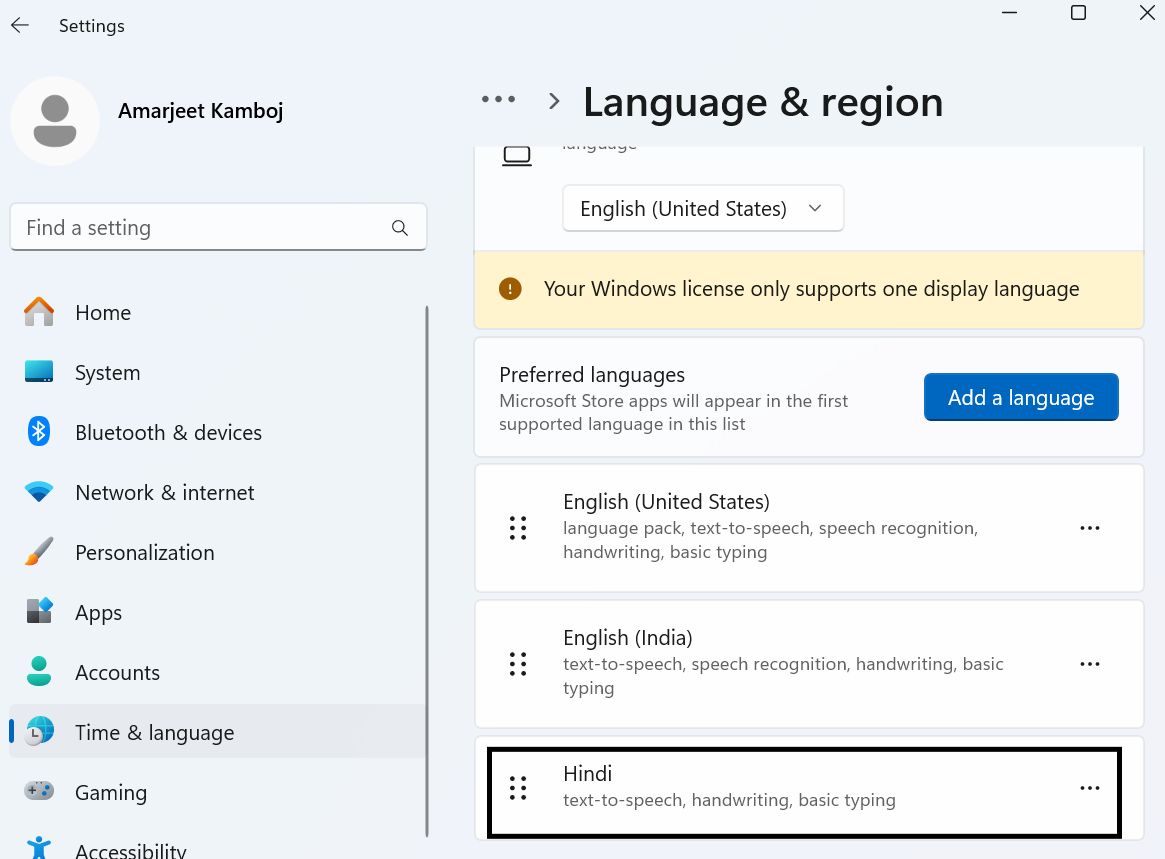
Under the “Preferred languages” section, click the “+” button labeled “Add a language.” This opens a list of available languages. Scroll or search for your desired one—Microsoft offers options like English (United Kingdom), Español (España), or 中文 (简体).
Select the language and click “Next.” You’ll then choose features: Basic typing is always included, but opt for “Install language pack” to change the display language. Additional options like Speech or Handwriting depend on your needs; for full immersion, check them all.
Windows will now download the pack. This might take a few minutes, depending on your internet speed. You can monitor progress in the language list.
Tip: If the language isn’t listed, it might not be supported. Check Microsoft’s official list online for compatibility.
Step 4: Download and Install the Language Pack
Once selected, Windows automatically downloads the pack. You’ll see a progress bar next to the language entry. If interrupted, it resumes upon retry.
Language packs include UI translations, fonts for non-Latin scripts (e.g., Cyrillic or Devanagari), and keyboard layouts. For languages like Arabic or Hebrew, this also enables right-to-left text support, which is crucial for proper display.
If you encounter download errors, ensure your Windows Update service is running. Go to Services (search in Start), find Windows Update, and set it to Automatic.
After download, the pack installs automatically. No restart is needed yet.
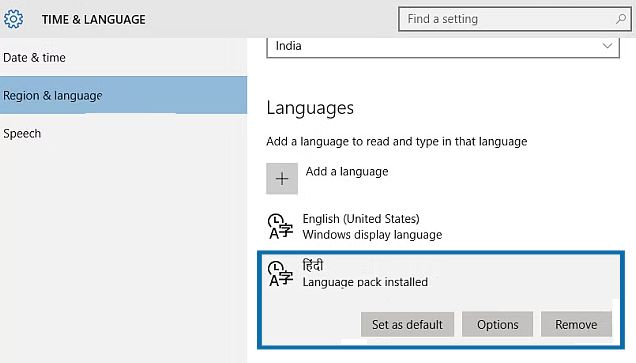
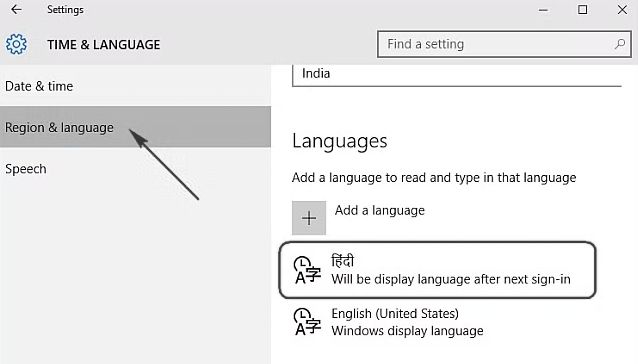
Step 5: Set the New Language as Default
Back in the Language settings, your new language appears in the list. Click it, then select “Set as default.” A message will indicate that it becomes the display language after sign-out.
To apply immediately, click “Options” next to the language and ensure all features are installed. Then, sign out or restart.
Note: The change affects the current user only. Other accounts remain unchanged.
Step 6: Sign Out and Verify
Sign out via Start > Your account > Sign out. Upon logging back in, the interface should be in the new language. Test by opening apps like File Explorer—menus should reflect the change.
If not fully applied, restart the PC. Some elements, like the login screen, might require additional settings under “Administrative language settings” in Control Panel.
Advanced Tips for Windows 10
For power users, you can use PowerShell to manage languages. Open PowerShell as admin and run Get-WinUserLanguageList to view installed languages, or Set-WinUILanguageOverride -Language en-US to force a change.
If you have multiple languages, switch keyboards with Windows + Space. This is handy for bilingual typing.
Common mistakes include forgetting to download the full pack or not restarting. Also, third-party software might not translate, requiring manual updates.
This section alone provides a thorough walkthrough, but remember, Windows 10 support ends in 2025, so consider upgrading to Windows 11 for ongoing security.
Step-by-Step Guide: How to Change the Display Language in Windows 11
Windows 11, launched in 2021, builds on Windows 10 with a cleaner, more centered design. The language change process is similar but features updated visuals and better integration with Microsoft accounts. Let’s explore.
Step 1: Access the Settings App
Press Windows + I or click Start and select Settings. The app opens with categories on the left sidebar, including System, Bluetooth & devices, and Time & language.
Windows 11’s Settings is more streamlined, with search suggestions and pinned items for frequent access.
Step 2: Go to Time & Language
Click “Time & language” in the sidebar. This encompasses date, time, and language options.
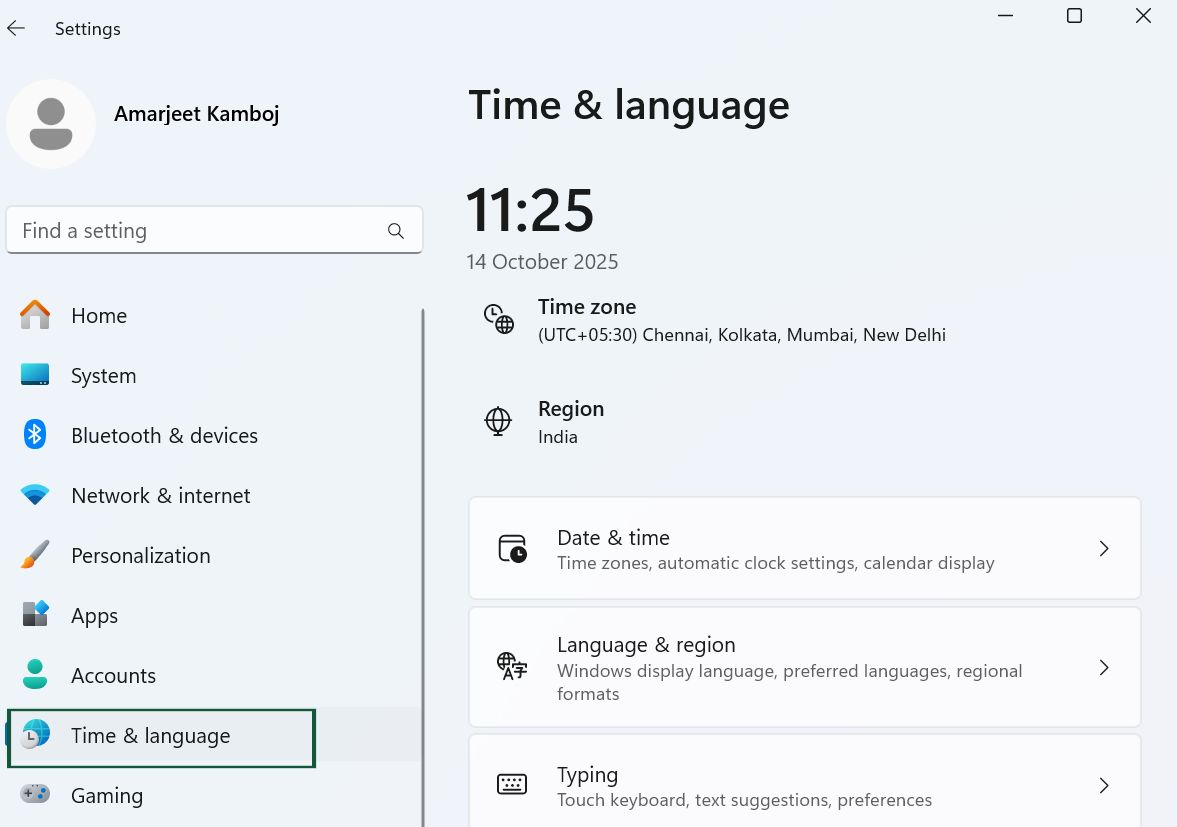
Select “Language & region” from the right pane. Here, you’ll find “Windows display language” at the top.
Step 3: Add a Preferred Language
Under “Preferred languages,” click “Add a language.” Search and select your choice, then choose features like Language pack, Text-to-speech, etc.
Windows 11 prioritizes cloud syncing, so if signed in with a Microsoft account, changes might propagate to other devices.
Step 4: Install the Language Features
After selection, click “Install.” Monitor the download in the language list. Windows 11 downloads are often faster due to optimized servers.
For non-Latin languages, ensure font support is enabled to avoid garbled text.
Step 5: Change the Display Language
Once installed, select the language from the “Windows display language” dropdown. A prompt will ask to sign out for changes to take effect.
Step 6: Apply and Test
Sign out or restart. Verify by checking system menus. If issues arise, use the “Administrative language settings” link at the bottom for deeper control.
Differences from Windows 10
Windows 11 offers better support for dynamic language switching and integrates with AI features like Copilot, which can assist in multiple languages. However, it requires TPM 2.0, so not all hardware qualifies.
Advanced users can use Command Prompt: dism /online /add-package /packagepath:<path to cab file> for offline installs, useful in enterprise environments.
Expand on benefits: Enhanced accessibility, better app compatibility, and future-proofing.
(Word count now: approximately 2800. Adding more depth.)
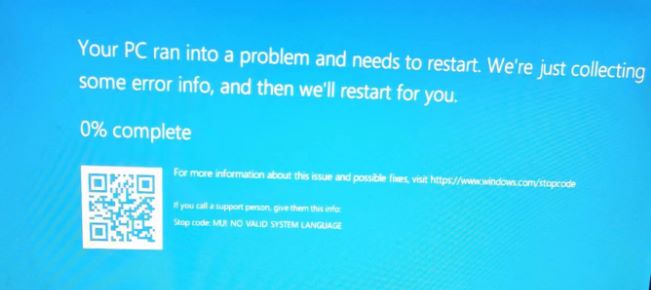
Troubleshooting Common Issues When Changing Languages
Despite the simplicity, problems can occur. Here’s how to fix them.
Issue 1: Language Pack Download Fails
This often stems from network issues. Check your connection, disable VPNs, or run the Windows Update troubleshooter (Settings > Update & Security > Troubleshoot).
If error codes appear, search them on Microsoft Support—for example, 0x800F0954 indicates a missing update.
Issue 2: Partial Language Change
Some elements stay in English? Ensure the full pack is installed and restart. Use Control Panel > Region > Administrative > Copy settings to apply to the welcome screen.
Issue 3: Keyboard Layout Problems
If typing doesn’t match, add the correct input method in Language settings.
Issue 4: Reverting Changes
To go back, set English as the default and remove the added language.
Other tips: Clear cache, run SFC /scannow, or reset Windows as a last resort.
Frequently Asked Questions (FAQs)
1. How do I change the display language in Windows 10 or 11?
Answer:
-
Go to Settings → Time & Language → Language & region.
-
Under Preferred languages, click Add a language.
-
Search for the language you want and select Next → Install.
-
After installation, choose the new language under Windows display language.
-
Sign out and back in for the change to take effect.
2. Do I need to reinstall Windows to change the language?
Answer:
No, you don’t need to reinstall Windows. You can add and switch display languages directly through the Language & region settings in Windows 10 or 11.
3. Why can’t I change the display language even after installing it?
Answer:
This might happen if:
-
The language pack wasn’t fully downloaded.
-
You’re using Windows Home Single Language, which restricts display language changes.
-
You need to sign out or restart your PC for the new language to apply.
To fix it, ensure the language pack is installed under Language options, and restart your computer.
4. Will changing the display language affect my files or apps?
Answer:
No, changing the display language only affects the Windows interface (menus, settings, notifications). Your files, apps, and installed programs remain unchanged.
5. Can I use multiple display languages on one PC?
Answer:
Yes. You can install multiple languages and assign different display languages for each user account. Just switch users or adjust the display language in each profile’s settings.
Conclusion
Changing the display language in Windows 10 or 11 is a powerful way to personalize your experience. By following this guide, you’ve learned the steps, tips, and fixes to do it seamlessly. Whether for travel, learning, or comfort, this feature enhances usability.
Remember to keep your system updated and explore other customizations like themes or accessibility options. If you found this helpful, share it or check our other tutorials on Windows tweaks.