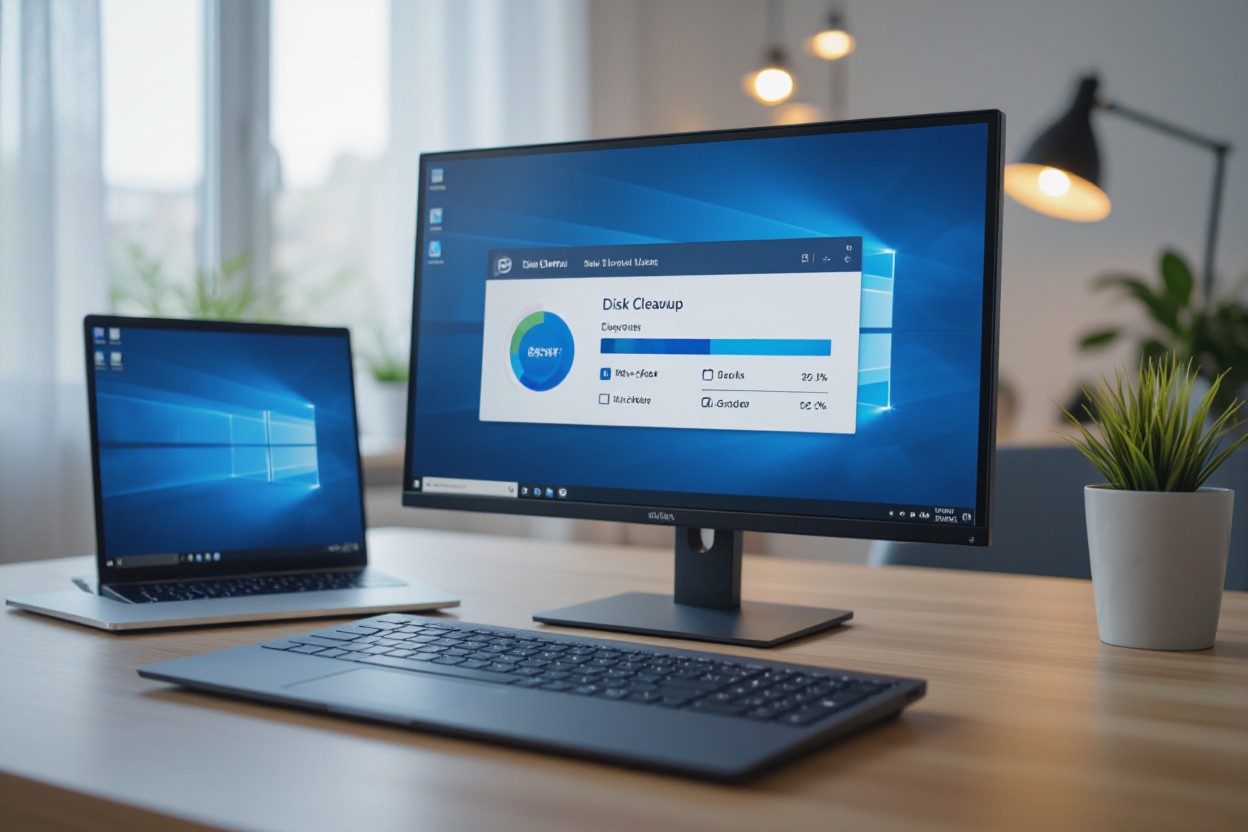
Disk Cleanup in Windows 11 guides you to quickly reclaim storage and speed up your PC by removing temporary files, cached data, and optional system files; you can run it as an administrator to remove system files, but be aware it may permanently delete files you no longer need, so review selections before confirming.
Read Also: How to Get Help in Windows 11 [Top 15 Ways]
Table of Contents
Understanding Disk Cleanup
What is Disk Cleanup?
Disk Cleanup is a built-in Windows utility that scans your drives and lists removable file categories—temporary files, thumbnails, the Recycle Bin, and browser cache—so you can delete them in a few clicks. The tool also offers a “Clean up system files” mode that exposes deeper options such as Windows Update Cleanup, Previous Windows installation(s) (Windows.old), and device driver packages; removing those can recover tens of gigabytes after a major feature update.
The classic executable (cleanmgr.exe) remains available alongside newer features like Storage Sense, giving you granular control over what gets removed. In practical tests, clearing temporary files and update remnants often frees between a few hundred megabytes and more than 20 GB depending on how long you’ve gone without maintenance; on a 512 GB drive, that can translate to a noticeable increase in available space and fewer installation failures for large apps or updates.
Why Use Disk Cleanup in Windows 11?
You use Disk Cleanup to reclaim storage, reduce clutter that slows searches and indexing, and remove outdated update files that can block further updates. Low free space—below about 10% of a drive’s capacity—can hamper virtual memory and Windows update operations; a targeted cleanup that removes 5–20 GB can often restore normal update behavior and prevent installation errors for new programs or games.
Beyond immediate space gains, Disk Cleanup can improve system responsiveness by deleting thousands of small temporary files that bloat the file system and increase indexing overhead. Run Disk Cleanup as an administrator to access the most impactful options, and consider pairing it with Storage Sense or scheduled maintenance if you need continuous automated housekeeping.
Accessing Disk Cleanup
Disk Cleanup (cleanmgr.exe) remains available in Windows 11 and you can launch it directly to scan specific drives for temporary files, system caches, and update leftovers. Typical scans surface categories like Temporary files, System created Windows Error Reporting, and Previous Windows installations — deleting the latter can commonly free 15–30 GB after an upgrade but also prevents rolling back to the prior build.
You’ll get the most comprehensive options if you choose Clean up system files after the initial scan; that reveals Windows Update Cleanup and device driver packages that can reclaim multiple gigabytes. Running Disk Cleanup as an administrator or via the system executable located at C:\Windows\System32\cleanmgr.exe unlocks those system-level entries.
Step-by-Step Guide to Open Disk Cleanup
Quick methods to open Disk Cleanup include the built-in search, Run dialog, File Explorer, and command-line switches; pick the one that fits your workflow.
Step-by-Step Methods
| Method | How to do it |
|---|---|
| Start menu search | Type “Disk Cleanup” or “cleanmgr” in Start, then select the app. Right-click and choose Run as administrator to access system files. |
| Run dialog | Press Win+R, enter cleanmgr, and press Enter. Add /d C: to target a specific drive (e.g., cleanmgr /d C:). |
| Command Prompt / PowerShell | Run cleanmgr or use advanced switches like cleanmgr /sageset:1 then cleanmgr /sagerun:1 to save and run custom cleanup profiles. Use Start-Process cleanmgr -Verb RunAs in PowerShell to elevate. |
| File Explorer | Navigate to C:\Windows\System32\cleanmgr.exe and double-click. Right-click → Run as administrator to reveal system cleanup options. |
| Settings (alternative) | Open Settings → System → Storage → Temporary files to use the modern cleanup UI (not Disk Cleanup but useful for quick temporary-file removal). |
Alternative Methods to Access Disk Cleanup
You can automate Disk Cleanup using the /sageset and /sagerun switches to run the exact same cleanup profile on demand or via Task Scheduler; enterprises often use cleanmgr /sageset:65535 to expose every option and then schedule cleanmgr /sagerun:65535 weekly for maintenance. Another route is creating a desktop shortcut to C:\Windows\System32\cleanmgr.exe with elevated privileges for frequent access.
Windows 11 also encourages Storage Sense (Settings → System → Storage → Storage Sense) for automated cleanup based on rules you set — great for hands-off maintenance, but automated deletion of files like Windows.old or ESD installation files will remove rollback options, so use automation settings with caution.
Factors to Consider Before Using Disk Cleanup
Confirm whether you have a recent backup of your system or at least the folders you cannot lose; deleting some categories can remove installer caches or logs that help with troubleshooting. Check the Recycle Bin and Downloads folder manually—both commonly hold several gigabytes you may want to restore, and some installers in Downloads are still needed. If you use hibernation or rely on large pagefile settings, factor those into your free-space calculations so you don’t unintentionally remove space reserved by the OS.
Run Disk Cleanup as an administrator to expose System files like Windows Update Cleanup and older Windows installations, which can free from a few hundred megabytes up to 20–30 GB after feature updates but may prevent rollback. Review available restore points because deleting system files can remove the ability to roll back a problematic update; note the impact on recovery options before you remove anything. This ensures you retain the ability to recover if a cleanup step causes issues.
Types of Files Disk Cleanup Targets
Disk Cleanup groups items into categories you can select individually; typical targets include temporary files, downloaded program files, delivery optimization files, and thumbnails. Temporary files often consume between 100 MB and several gigabytes depending on application use, while Windows Update Cleanup can be the largest single category after feature updates. Use the list below to prioritize which categories you want to remove:
- Temporary Files — browser and app caches
- Recycle Bin — files you already decided to delete
- Downloaded Program Files — ActiveX and installer caches
- Windows Update Cleanup — old update packages and superseded files
- Thumbnails — regenerated automatically, low impact
| Temporary Files | 100 MB – 5+ GB depending on apps and browser caches |
| Windows Update Cleanup | 1 GB – 30 GB after major updates; removes rollback data |
| Downloaded Program Files | 10 MB – 2 GB; safe to remove if installers are backed up |
| Recycle Bin | Varies; check for large media or documents before emptying |
| Thumbnails | Usually < 100 MB; restored automatically as needed |
Focus first on categories that return the most space with the least risk, such as Temporary Files and the Recycle Bin, while leaving Windows Update Cleanup until you’ve confirmed you won’t need to roll back an update. After you verify sizes and have backups for any important installers or documents, proceed to select the categories to remove.
Assessing Disk Space Before Cleanup
Open Settings > System > Storage to get an immediate breakdown of used space by category and the exact free space on your system drive; Windows 11 typically requires at least 64 GB for clean installs and recommends keeping 10–15% of the disk free for optimal performance. A 256 GB SSD with less than 20–25 GB free often shows performance degradation during updates and file operations, so target freeing at least 10% or a minimum of 20 GB depending on your drive size and usage.
Use a tool like WinDirStat or Storage Sense’s detailed view to locate large folders—Games, VM images, user downloads, and old ISO files are frequent space hogs. Check the size of the pagefile and any hibernation file: on systems with 16 GB RAM, hibernation can consume ~16 GB; disabling hibernation temporarily frees that space but removes hibernate functionality.
For a quick actionable approach, sort files in File Explorer by size within your user folders and delete or move items larger than 500 MB that you no longer need; consider an external drive or cloud storage for media libraries exceeding several tens of gigabytes.
How to Use Disk Cleanup Effectively
Selecting Items for Cleanup
Open the Disk Cleanup dialog and scan the listed categories: Temporary Files, Thumbnails, Recycle Bin, Downloaded Program Files, Delivery Optimization Files, and (after elevating) Windows Update Cleanup and Previous Windows installation(s). Typical temporary files range from a few hundred MB to several GB; Windows Update Cleanup and Previous Windows installation(s) often free the most space, sometimes 20+ GB on systems that have accumulated updates or an old Windows.old folder.
Use the View Files link for Downloads or Recycle Bin before checking them because deleting those items permanently removes your personal files. Favor selecting Windows Update Cleanup, Temporary Files, and Thumbnails first for maximum safe gains; leave Downloads and large folders unchecked until you verify contents or back them up.
Running Disk Cleanup
After selecting the drive (usually C:), let Disk Cleanup calculate reclaimable space — this can take 30–120 seconds depending on disk size and fragmentation. Click Clean up system files to re-scan with elevated privileges; that reveals system-level options like Windows Update Cleanup and Previous Windows installation(s) that are not visible to a standard user.
To run Disk Cleanup with chosen settings from the command line, open an elevated Command Prompt and use the two-step method: run cleanmgr /sageset:1 to choose options once, then schedule or run cleanmgr /sagerun:1 to execute those choices automatically. Task Scheduler can call sagerun periodically (for example weekly) so you reclaim space without manual steps.
Expect Disk Cleanup to sometimes require a restart if system files in use are being removed; plan to run cleanup before shutting down for maintenance windows. Windows 11 also includes Storage Sense (configurable to remove temporary files and items in Recycle Bin older than 30 days), but Disk Cleanup remains useful for one-off large reclaim operations like removing Windows.old or accumulated update files, which can free multiple gigabytes in a single pass.
Tips for Optimizing Disk Cleanup Usage
Run Disk Cleanup with the “Clean up system files” option to gain access to larger reclaimable items like Windows Update Cleanup and Previous Windows installation (Windows.old); those can free anywhere from 5–20 GB after a major feature update, and a Windows.old folder often consumes 10–30 GB. Scan the list and uncheck items you might need for rollback or troubleshooting — deleting Windows.old removes the ability to revert to the prior build, and clearing System Restore or shadow copies will eliminate restore points that could be needed after a bad update.
Disable hibernate with powercfg /hibernate off to remove hiberfil.sys and recover roughly the size of your installed RAM (for example, ~8 GB on a system with 8 GB RAM). Audit categories like the Recycle Bin and Temporary files before deletion, and use administrative tools for bigger cleanups — you can typically reclaim 10–50 GB on systems that haven’t been cleaned in several months, but check the sizes listed for each category first.
- Disk Cleanup
- Storage Sense
- Windows Update Cleanup
- Windows.old
- hiberfil.sys
- Recycle Bin
Scheduling Regular Cleanups
Use Storage Sense (Settings > System > Storage) to automate basic cleanup: set it to run Every day, Every week, or Every month depending on usage — weekly suits most users, while heavy downloaders or creators may prefer daily. Configure automatic rules to empty the Recycle Bin after 30 days (or 7 days for aggressive turnover) and to delete files in Downloads older than 30 days if you don’t rely on that folder for long-term storage.
Schedule advanced Disk Cleanup tasks with Task Scheduler using the built-in switches: run cleanmgr.exe /sageset:1 once to choose options, then schedule cleanmgr.exe /sagerun:1 to execute that profile under elevated privileges. Time these tasks during low-use hours (for example, 03:00 on Sundays) and run Windows Update Cleanup monthly since it may require a reboot and admin rights to complete.
Combining with Other Maintenance Tools
Start maintenance by running Disk Cleanup to free space, then follow with disk integrity and optimization tools: run chkdsk to repair file system errors after unexpected shutdowns, and use Optimize Drives on HDDs to defragment (schedule monthly); skip defragmentation on SSDs and rely on TRIM/Optimize instead. Freeing space first reduces defragmentation time and avoids unnecessary writes on SSDs.
Pair built-in utilities with careful use of third-party tools: reputable apps like WinDirStat help you visualize large folders, while cleaners such as CCleaner should be used sparingly and configured to avoid deleting browser passwords or system files. Keep backups via File History or OneDrive before removing large items or clearing restore points, and run a full disk check quarterly if you experience frequent crashes.
Establish a simple workflow: run Storage Sense weekly for temp files, schedule a monthly Disk Cleanup profile with /sagerun for system-level items, and perform quarterly chkdsk and HDD defrag (if applicable) plus a visual scan with WinDirStat to hunt down unexpected large folders. Knowing this workflow — weekly Storage Sense, monthly Disk Cleanup with /sagerun, and quarterly checks — keeps your drive lean and responsive.
Troubleshooting Disk Cleanup Issues
If Disk Cleanup hangs on “Scanning for files” or shows little to no recoverable space despite low free disk capacity, start by running Disk Cleanup as an administrator (search cleanmgr.exe, right‑click, Run as administrator) and choose “Clean up system files.” Corrupted component store entries often block Windows Update Cleanup; run sfc /scannow followed by DISM /Online /Cleanup-Image /RestoreHealth from an elevated Command Prompt, then retry. Systems with long update histories commonly accumulate >10–20 GB in WinSxS or Windows.old folders, so targeting Windows Update Cleanup and Previous Windows installations can yield the biggest immediate gains.
When Disk Cleanup fails with error codes (for example, 0x80070002 or 0x80070057) check Event Viewer under Windows Logs → Application/System for matching entries and stop the Windows Update service (wuauserv) before clearing the C:\Windows\SoftwareDistribution\Download folder; this often resolves stalled update-cache issues without affecting installed updates. If Disk Cleanup reports removal of System Restore points or shadow copies, note that deleting these will remove restore capability; treat Shadow Copies/System Restore as potentially dangerous to remove unless you have a full backup.
Common Problems and Solutions
If Disk Cleanup hangs, open Task Manager and watch for high disk activity from TrustedInstaller.exe or msedge.exe—background updates or antivirus scans can block cleanup. Kill nonnecessary processes, or boot to Safe Mode and run Disk Cleanup there. For persistent space reporting errors, run chkdsk /f (schedule on next reboot) to correct filesystem inconsistencies that can make free space invisible to Windows.
Insufficient space reclaimed after cleanup often means large user folders are the culprit: check Downloads, Videos, and virtual machine images with tools like WinDirStat or TreeSize to locate files >1 GB. If you need to remove the Windows.old folder and the standard cleanup won’t clear it, use Settings → System → Storage → Temporary Files or run cleanmgr.exe with elevated privileges; avoid manual deletion of C:\Windows without guidance. For repeated update cleanup failures, run the Windows Update Troubleshooter and consider resetting Windows Update components via net stop wuauserv, net stop bits, rename SoftwareDistribution, then net start services.
When to Seek Further Help
If Disk Cleanup errors persist after SFC/DISM and chkdsk, or if you encounter repeated blue screens or unexplained data loss after cleanup operations, escalate to professional support. Provide exact error codes, timestamps, and the Event Viewer log entries related to Volume Shadow Copy, Windows Update, or Filesystem errors; these accelerate diagnostics. Encrypted volumes (BitLocker) and RAID arrays introduce additional risk—contact your IT admin or a Microsoft support agent before manual deletions if encryption or custom storage drivers are used.
Loss of restore points, deletion of recovery partitions, or accidental removal of user data are situations where you should stop further changes and seek help immediately—continued writes can overwrite recoverable data. Use file‑recovery professionals or reputable recovery software only after isolating the drive; do not run disk cleanup, defragmentation, or repeated chkdsk passes on a drive you expect to recover data from, since those actions reduce recovery odds.
Before contacting support gather: the results of sfc /scannow and DISM, CHKDSK output, a WinDirStat or TreeSize snapshot, and the exact steps you ran (including any command lines). Boot into Safe Mode and reproduce the issue if possible, capture screenshots of error messages or Event Viewer entries, and note whether BitLocker or third‑party disk tools are in use—this information shortens troubleshooting time and helps the technician provide targeted fixes.
Summing up
To wrap up, using Disk Cleanup in Windows 11 lets you reclaim space quickly: open Disk Cleanup (or go to Settings > System > Storage > Storage Sense), choose the drive, click “Clean up system files” to access more options, check categories such as Temporary files, Recycle Bin, and Windows Update Cleanup, then confirm to remove the selected items. You can also enable Storage Sense to automate routine cleanups and free space on a schedule.
When you clean system files, run Disk Cleanup as an administrator to remove update leftovers and previous Windows installations, inspect selected items so you don’t delete data you need, and back up important files before proceeding. Use Disk Cleanup periodically and combine it with Storage Sense to keep your system lean and maintain consistent performance.
FAQ
Q: How do I open and run Disk Cleanup in Windows 11?
A: Open Disk Cleanup by typing “Disk Cleanup” or “cleanmgr” in Start and selecting the app. Choose the drive you want to clean and click OK. To remove system-level files (Windows Update files, previous installations), click “Clean up system files” — the tool will relaunch with elevated rights and prompt for the drive again. Check the boxes for the file categories you want to remove (Temporary files, Recycle Bin, Thumbnails, Delivery Optimization Files, etc.), click OK, then choose “Delete Files.” You can also right‑click a drive in File Explorer, choose Properties → Disk Cleanup to access the same interface.
Q: Which Disk Cleanup options are safe to remove and which need caution?
A: Safe to remove: Temporary files, Thumbnails, Recycle Bin (if you no longer need trashed files), Temporary Internet Files, and Delivery Optimization Files. Use caution with: Downloads (often contains personal files), Previous Windows installations and Windows Update Cleanup (deleting these prevents rolling back major updates or uninstalling some updates), Device driver packages, and system restore points/shadow copies (found under the “More Options” tab). If you might need to revert an update or restore a file, do not delete previous installations or restore points; otherwise cleaning them frees substantial space.
Q: How can I free up more space or automate cleanup beyond the basic Disk Cleanup steps?
A: For deeper cleanup: run “Clean up system files” to remove Windows Update leftovers and previous installations; use the “More Options” tab to remove system restore points and shadow copies if you don’t need them. To automate or schedule cleaning, use cleanmgr with command-line switches: run cleanmgr /sageset:n to create a preset and cleanmgr /sagerun:n to execute it (can be scheduled via Task Scheduler). Alternatively, use Settings → System → Storage → Storage Sense to configure automatic deletion of temporary files and automatic emptying of the Recycle Bin.


